This guide will explain every step needed to create your
custom workflow in Dynamics 365.
Create Enum
The base enum is used to define the status of the workflow. Create
a new Enum for the workflow status
We can use VersioningDocumentState Enum from [Application
Suite] Model
But in this article, we will create new Enum for our
Customized workflow
Create A
New Field on the Table
–
Here, we use the table SF_Table as an example. Open the table and drag
Enum to table.
Create Table Methods
Next, you will be required to create methods on the table:
You can add method for custom table like below
Create methods with the following names
·
canSubmitToWorkflow
·
UpdateCustWorkflowState
Very Important Note :
For Table
Extensions
Extend
the table
Create
a new class TableName_Extension
Create
methods with the following names
·
canSubmitToWorkflow
·
UpdateCustWorkflowState
public boolean canSubmitToWorkflow(str _workflowType = '')
{
boolean ret;
ret = super(_workflowType);
if (this.SF_WorkflowStatus == SF_WorkflowStatus::Draft)
{
ret = boolean::true;
}
else
{
ret = boolean::false;
}
return ret;
}
static void updateWorkflowStatus(RefRecId _recId, SF_WorkflowStatus _status)
{
SF_Table _SF_Table;
select forupdate _SF_Table
where _SF_Table.RecId == _recId;
ttsBegin;
_SF_Table.SF_WorkflowStatus = _status;
_SF_Table.update();
ttsCommit;
}
Create query
for the custom table
Create workflow category
Set the following properties for the Work
flow category
Module – Select the module
(in which module workflow category belongs).
Label : set the label
Create work
flow type
Set the
following to create the workflow types.
1- Category – Name of the
Created Workflow category.
2- Query – Name of the created
query.
3- Document menu item –
Name of display menu item for the form to enable Workflow.
Click Finish to create
workflow type
Add the following
code Work flow type event handler
EventHandler class
which gives implementation to handle different workflow events.
public class SF_WorkflowTypeEventHandler implements WorkflowCanceledEventHandler,
WorkflowCompletedEventHandler,
WorkflowStartedEventHandler
{
public void started(WorkflowEventArgs
_workflowEventArgs)
{
// TODO: Write code to
execute once the workflow is started.
SF_Table::updateWorkflowStatus(_workflowEventArgs.parmWorkflowContext().parmRecId(),SF_WorkflowStatus::Submitted);
}
public void canceled(WorkflowEventArgs
_workflowEventArgs)
{
// TODO: Write code to
execute once the workflow is canceled.
SF_Table::updateWorkflowStatus(_workflowEventArgs.parmWorkflowContext().parmRecId(),SF_WorkflowStatus::Canceled);
}
public void completed(WorkflowEventArgs
_workflowEventArgs)
{
// TODO: Write code to
execute once the workflow is completed.
SF_Table::updateWorkflowStatus(_workflowEventArgs.parmWorkflowContext().parmRecId(),SF_WorkflowStatus::Completed);
}
}
Enable Workflow on the
custom form Design properties
1- Workflow Enabled – Yes
2- WorkflowDatasource –
Name of the form data source
3- Workflow Type – Name
of the custom Workflow Type
Add the below logic to submit manager class
public class SF_WorkflowTypeSubmitManager
{
public static void main(Args _args)
{
// TODO: Write code to execute once a work item is
submitted.
SF_Table
_SF_Table;
SF_WorkflowTypeSubmitManager submitManger;
recId _recId =
_args.record().RecId;
WorkflowCorrelationId
_workflowCorrelationId;
workflowTypeName
_workflowTypeName = workFlowTypeStr("SF_WorkflowType");
WorkflowComment note = "";
WorkflowSubmitDialog workflowSubmitDialog;
submitManger = new SF_WorkflowTypeSubmitManager();
//Opens the
submit to workflow dialog.
workflowSubmitDialog = WorkflowSubmitDialog::construct(_args.caller().getActiveWorkflowConfiguration());
workflowSubmitDialog.run();
if (workflowSubmitDialog.parmIsClosedOK())
{
_SF_Table = _args.record();
// Get
comments from the submit to workflow dialog.
note = workflowSubmitDialog.parmWorkflowComment();
try
{
ttsbegin;
_workflowCorrelationId = Workflow::activateFromWorkflowType(_workflowTypeName,
_SF_Table.RecId, note, NoYes::No);
_SF_Table.SF_WorkflowStatus = SF_WorkflowStatus::Submitted;
_SF_Table.update();
ttscommit;
// Send an Infolog message.
info("Submitted to workflow.");
}
catch (Exception::Error)
{
error("Error on workflow activation.");
}
}
_args.caller().updateWorkFlowControls();
}
}
Create a Workflow Approval
In
this step maybe you need to build model first.
Go to
Table and create new Table field group
Click Finish
Add the following code to Work flow approval event handler
public final class SF_WorkflowApprovalEventHandler implements WorkflowElementCanceledEventHandler,
WorkflowElemChangeRequestedEventHandler,
WorkflowElementCompletedEventHandler,
WorkflowElementReturnedEventHandler,
WorkflowElementStartedEventHandler,
WorkflowElementDeniedEventHandler,
WorkflowWorkItemsCreatedEventHandler
{
public void started(WorkflowElementEventArgs
_workflowElementEventArgs)
{
// TODO: Write code to
execute once the workflow is started.
}
public void canceled(WorkflowElementEventArgs
_workflowElementEventArgs)
{
// TODO: Write code to
execute once the workflow is canceled.
SF_Table::updateWorkflowStatus(_workflowElementEventArgs.parmWorkflowContext().parmRecId(),
SF_WorkflowStatus::Canceled);
}
public void completed(WorkflowElementEventArgs
_workflowElementEventArgs)
{
// TODO: Write code to
execute once the workflow is completed.
SF_Table::updateWorkflowStatus(_workflowElementEventArgs.parmWorkflowContext().parmRecId(),
SF_WorkflowStatus::InReview);
}
public void denied(WorkflowElementEventArgs
_workflowElementEventArgs)
{
// TODO: Write code to
execute once the workflow is denied.
SF_Table::updateWorkflowStatus(_workflowElementEventArgs.parmWorkflowContext().parmRecId(),
SF_WorkflowStatus::Rejected);
}
public void changeRequested(WorkflowElementEventArgs
_workflowElementEventArgs)
{
// TODO: Write code to
execute once change is requested for the workflow.
SF_Table::updateWorkflowStatus(_workflowElementEventArgs.parmWorkflowContext().parmRecId(),
SF_WorkflowStatus::ChangeRequest);
}
public void returned(WorkflowElementEventArgs
_workflowElementEventArgs)
{
// TODO: Write code to
execute once the workflow is returned.
SF_Table::updateWorkflowStatus(_workflowElementEventArgs.parmWorkflowContext().parmRecId(),
SF_WorkflowStatus::Rejected);
}
public void created(WorkflowWorkItemsEventArgs
_workflowWorkItemsEventArgs)
{
// TODO: Write code to
execute once work items are created.
}
}
Craet New workflow Emelment Refrence to the supported
elements node of the Workflow type created
Set Element Name and Name (SF_WorkflowApproval)
Set the following properties for the menu item
Set the following properties:
- EnumTypeParameter to ModuleAxapta.
- EnumParameter to “Ledger”.
Add Display
menu to Menu and Set Display In content Area to YES
Design
the Workflow.
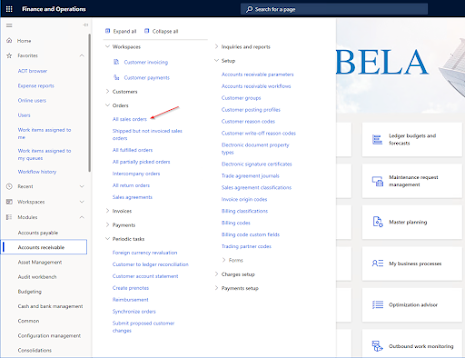
·
Navigate to General Ledger > Journal Setup > General Ledger workflows.
·
Create a new workflow
instance of the workflow type you created
Very Important Note:
You must use Microsoft
Edge to start workflow definition
- Define
the states from Start to End of the
workflow.
- Drag
approval element from Toolbox on the left to the Designer pane on the
right.
Resolve any errors and
warnings by setting workflow and approval element properties.
Activate it.
Go to your form >>
Create new record >> Save
Workflow is activated on
form