Database logging, also known as change tracking, in Dynamics 365 Finance and Operations is a very powerful security and audit tool that is surprisingly easy to setup. The database logging feature allows you to determine which table, and fields should be monitored and the events that should trigger the change tracking.
I hope this article provided you with a full understanding of the capabilities and functionality of the database logging in Dynamics 365 Finance and Operations. The detailed information provided in the log should meet any auditor requirements for transparency and audit trails.
Setup
first step is to define the tables and fields you want to track and to enable the database logging. When selecting tables to change track, think about the volume of database logs that may result from turning on database logging for a particular table. You may find that you can get what you need simply by using the created by, created date time, and modified date time fields that are found on most major tables.
For this example, I am going to setup change tracking on the vendor bank account table on the account number field. The scenarios is that the auditors require a full audit trail for any changes made to any vendor bank account information. This is a real audit/security requirement I have had on a previous implementation.
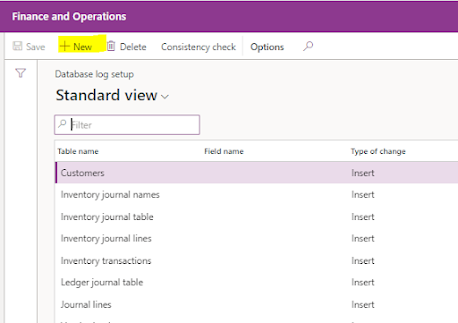
- Navigate to System administration > Setup > Database log > Database log setup.

This will open a wizard type form that we will click through. Click the “Next” button to proceed.
In this form we need to find the table and field we want to track. I prefer to show all tables and their system table names.
If you’re not sure of the table name and field you an find it by navigating to the form where you want to turn on change tracking and right click on the field you want to change track and click the “Form information” button and then click the “Form name” button.
This will open a panel that will give you the table name found in the “Datasource” field and the field name found in the “Data field” field. In this example the table I am looking for is “VendBankAccount” and the field I am looking for is called “AccountNum”.

Under the “General ledger” tab we find the “VendBankAccount” table. Click the checkbox next to “AccountNum” and "BankIBAN" and click “Next”
Now I can scroll down and find the table and field I want to track and define which actions should trigger the logging. In this example I only want to track changes when someone updates a record so I will enable the “Update” flag and click “Next”.
In the next form you will see a summary screen letting you know what all will be enabled for database logging. Click the “Finish” button to finish the configuration.
Next we will go through and test what we have configured.
Example
In this example we will take an already existing vendor with a vendor bank account already created and we will modify the account and view the database log that the system generates for the transaction.
- From the vendor record I will click the “Bank accounts” button in the “Vendor” tab in the ribbon.
Form here I will change the vendor bank account number
from “1212212221222” to “33366663333333”.
1- Now to see the log for this we can navigate to Record Info > Database log on the Form
You can see in the “Overview” section the type of record that was changed, the type of change that occurred, who made the change, and when the change occurred.
You can see additional details by clicking the “History” tab. This tab gives you the current and previous value of the field.
2- Now to see the log for this we can navigate to System administration > Inquiries and reports > Database > Database log.
You can see in the “Overview” section the type of record that was changed, the type of change that occurred, who made the change, and when the change occurred.
You can see additional details by clicking the “History” tab. This tab gives you the current and previous value of the field.
Cleanup
As mentioned earlier in this article it is important to have a cleanup strategy in place for the database log to ensure the growth of the log does not dramatically affect performance.
- You can do this by clicking the “Clean up log” button.
In the filter section you are able to set a date range based on the created date time of the database log record by clicking the “Filter” button . So, you could use a dynamic query range of (DayRange(-999,-365)) to delete all database log records older than one year.
You could also set the recurrence to run weekly or monthly and run over the weekend. When the cleanup job runs it will delete any database log record that falls within the specified query.
I hope this article provided you with a full understanding of the capabilities and functionality of the database logging in Dynamics 365 Finance and Operations. The detailed information provided in the log should meet any auditor requirements for transparency and audit trails.